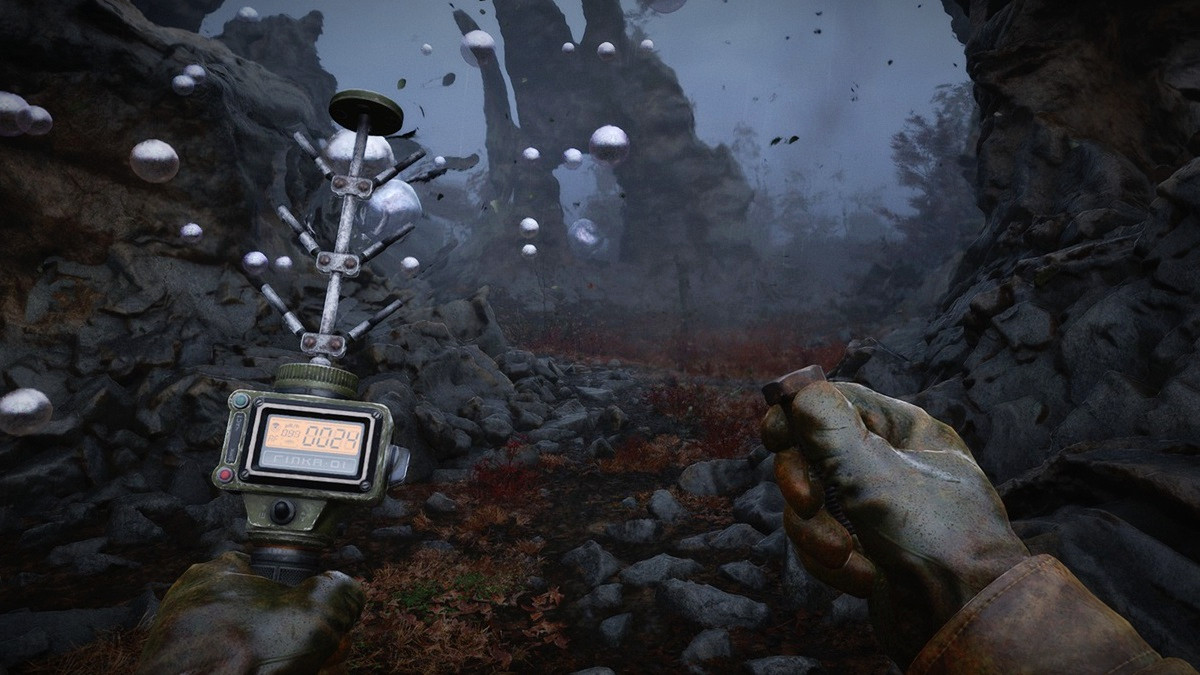
So, you’ve been happily rummaging through STALKER 2‘s Exclusion Zone, hunting for artifacts, only to grow sick and tired of the Echo detector? Worry not, because this game has three upgraded versions of the detector to choose from, each better than the last. You just have to hunt them down.
For franchise veterans jumping back into the thick of it, none of what I’m about to discuss below is going to be a novelty. All the classic detectors from Call of Pripyat are making a triumphant return in STALKER 2 as well, with the special addition of a new mid-tier option for the earlier stages of the game. No matter which one you choose to go with, though, rest assured that the starting Echo detector is absolutely the worst of the bunch, and you should upgrade from it as early as possible. Here’s how to get your hands on some of the alternatives!

All Detectors found in STALKER 2: Heart of Chornobyl
There’s a grand total of four unique detector models to be found in STALKER 2:
- Echo Detector
- Hilka Detector
- Bear Detector
- Veles Detector
I’ve listed them here in the order of utility/Koupon investment, and it’s worth pointing out right off the bat that it may take a while before you can upgrade from the Echo over to anything else. Most curiously, even though STALKER 2 does provide you with newer-generation detectors as you progress through the staggeringly long main questline, you can get each of the featured detectors before that. You just need to be a bit lucky with your traders’ stock, honestly.
Here are the special missions that will unlock specific detectors in STALKER 2:
- Hilka Detector: found during the “Budmo!” side-mission, which can be found in the Garbage area.
- Bear Detector: a reward for completing the “A Sign of Hope” side-mission, which can be found in the Noontide base, on Wild Island.
- Veles Detector: received during the “In Search of Past Glory” mission, as part of the main quest-line.
That being said, I’ve happily purchased a Hilka-type detector without playing the “Budmo!” side mission simply by finding it in the Barkeep’s inventory over at the 100 Rads Bar in Rostok. It only took a few more hours for me to find one lying about in the overworld, possibly as a randomized drop populated by the game. In other words, everything suggests there are multiple ways of upgrading your detector of choice, though completing the appropriate missions is the most straightforward way to get them.

How do different Detectors work in STALKER 2?
As soon as you pick up a new detector in STALKER 2, it’s going to be immediately apparent that there’s a minor learning curve to using it in practice. Veterans will already have this well in hand, I’m sure, but for the newcomers, here’s a quick cheat sheet explaining how each of the game’s detectors functions:
- Echo Detector: the closer you are to an Artifact, the more often the LED will pulse.
- Hilka Detector: the number denoted on the display shows your distance to the Artifact in meters. Approaching the Artifact drops the number, though the display takes a bit to refresh, so move about slowly.
- Bear Detector: the radar shows you the general distance and direction of the Artifact in relation to Skif.
- Veles Detector: the upgraded radar shows you the exact location of the nearby Artifact as a red-hot dot on the display.
To be perfectly clear, a skilled Stalker will be able to use the Echo Detector to find virtually any Artifact in the game. Upgraded detectors, however, make this process way more accessible so that you don’t have to risk your neck willy-nilly. So, the more you pay for your detector, the more information it will provide during your Artifact hunts.
Even if you have no intention of buying a Veles Detector, should you find one in a trader’s inventory, I recommend upgrading to Hilka and/or Bear, as they’re incomparably more useful than the baseline Echo Detector.


