At long last, you’ve done it. Our Disney Dreamlight Valley protagonist has unlocked The Storybook Vales’ Beanstalk Marshes and is about to confront Maleficent. Let’s start the Mistress of All Evil quest and get one step closer to resolving these problems between her and Hades.
The Mistress of All Evil quest walkthrough
You’ll immediately begin the Mistress of All Evil quest after unlocking the Beanstalk Marshes. Our destination is Maleficent’s Castle, which you’ll find in the center of the biome.
Upon entering, you’ll meet the one and only queen herself. Approach Maleficent and explain the situation to her. At first, she tells you she’s happy about how quiet things have been lately, but you’re far too persuasive to let that be the case. Following some back and forth, she’ll consider cooperating with you if you do her a few favors.

Apparently, a few pets of hers have escaped and wreaked havoc on her castle. It’s up to you to clean things up and find them.
Finding Maleficent’s Throne
Our first stop is the staircase next to the glowing mushroom chest. You’ll need to back up slightly from where you were talking to Maleficent to find it. Up these stairs is a wheel you’ll need for later.

Next up is the opposite staircase. Head up them before turning left to find a treasure with a yummy snack before looking down the hall. You’ll see upside-down dragon and tower symbols, which you’ll need to remember for later.

Or, well, you need to remember them now, as the question block door next to Maleficent is our next destination. Use your shovel to rearrange the blocks so the dragon is connected to the bat and the tower closest to Maleficent. The door will open, allowing you to proceed further.

Venturing further, you’ll find a room full of mystery blocks and a treasure chest in one of the corners. If you liked these puzzles before, this should be fun. You’ll find the solutions all over the room, particularly in these three locations:
- On the wall next to you
- Across from you, next to the bookshelves
- Behind the bookshelves on the room’s right side.
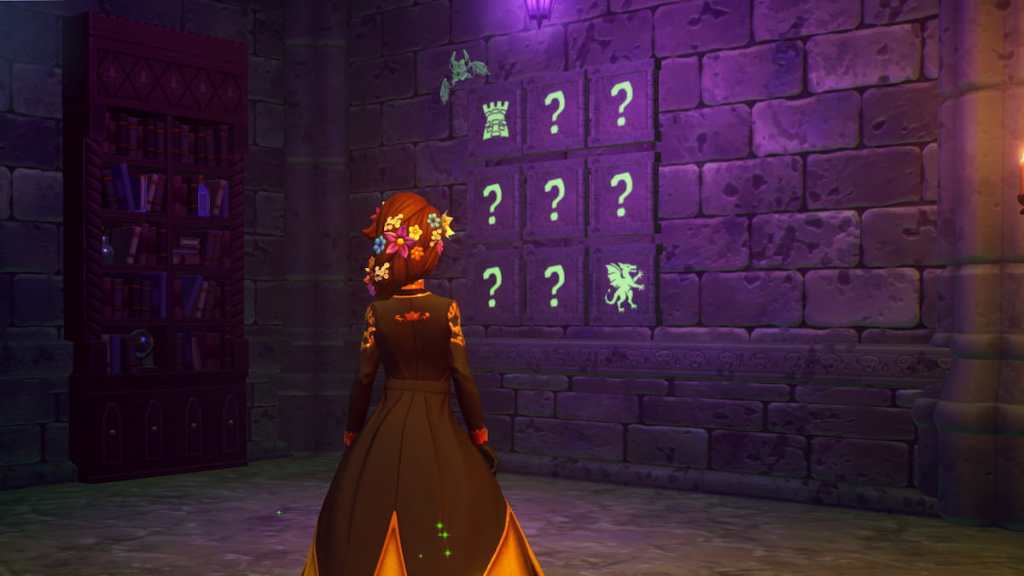
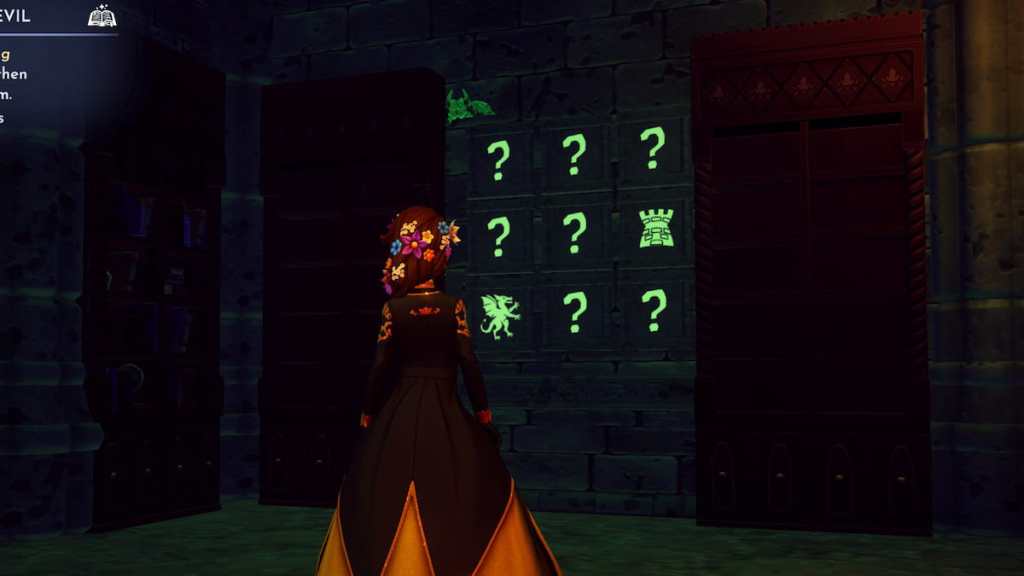
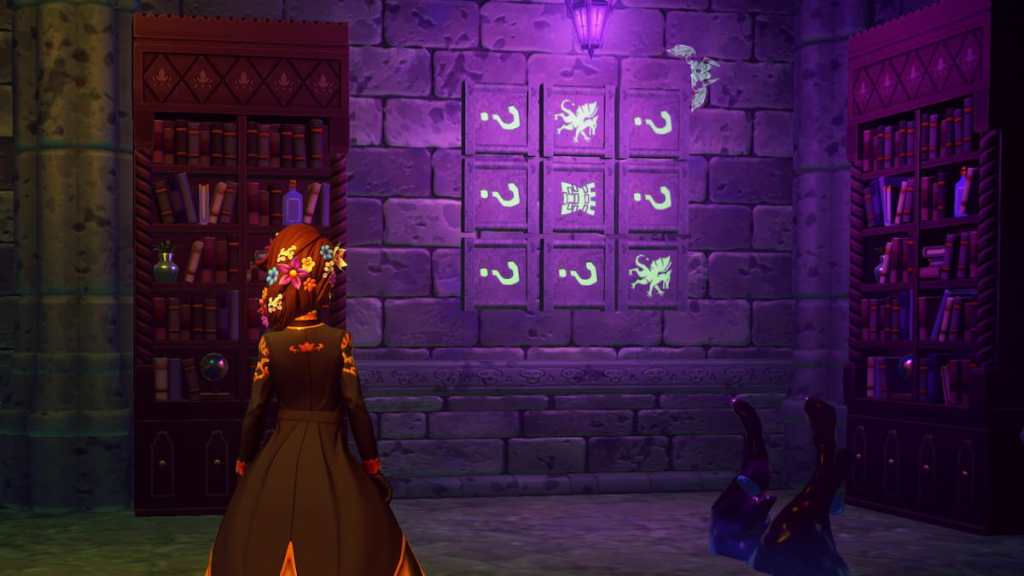
With this information in mind, you’ll reveal the solution below:
| Tower | ? | Dragon |
| Dragon | Tower | Tower |
| Dragon | ? | Dragon |
Since the wall solutions don’t show answers for the top and bottom blocks, you’ll leave these as question marks. The door will open upon flipping over the others, revealing a chest containing Maleficent’s Throne. You’ll also find a second treasure chest along one of the walls that gives you 500 Star Coins.
Finding Maleficent’s Spinning Wheel
Once you leave that room, head toward the opposite door. You’ll see a pedestal, which you can use the wheel on to repair it. From here, give it a quick swing with your net to open the door, giving you access to your second puzzle room.

This time, you’ll find a bunch of bookcases, ink, and glowing green symbols indicating another mystery block puzzle. There’s also a treasure chest up one of the staircases containing some Petrified Wood.
Right away, we can find a hint on the first bookshelf you see when you walk in. You’ll find a flower symbol with the Roman numeral IV on its other side. On a nearby wall visible from here, you’ll see a wolf with III above it. Keep these in mind for later.

Next, we’ll turn directly left and interact with the bookshelf blocking the doorway to find a dragon. Turning around, you’ll find the II Roman numeral in the corner next to the door.
With that done, run to the opposite side of the door. Before interacting with the bookshelf, turn right and follow the path until you reach a wheel. Spin it with your net to bring the chandelier down to the ground, confirming the tower is in the first block slot.
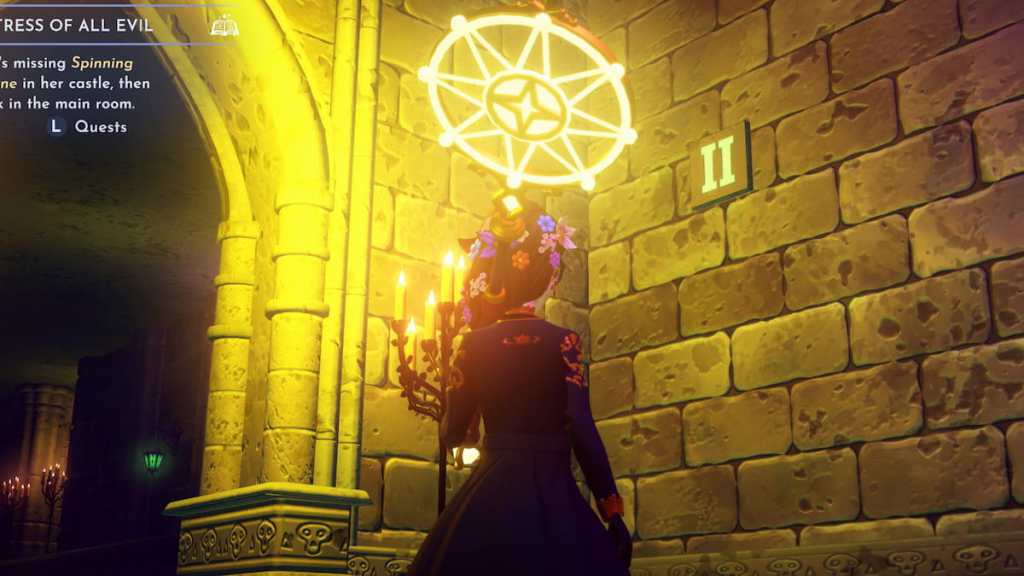
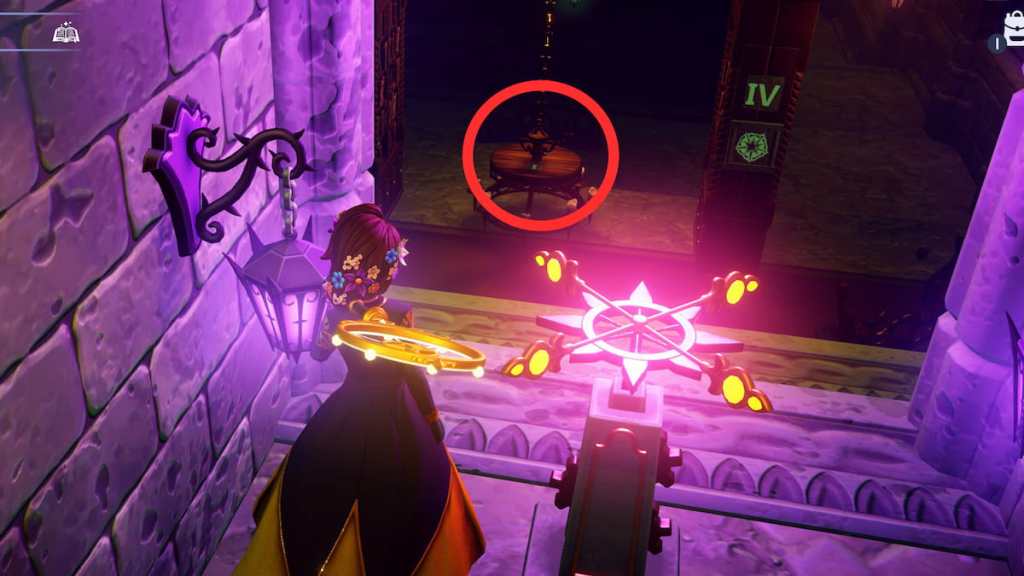
Now that we officially have all four answers interact with the second bookshelf and turn the blocks until Maleficent’s spinning wheel appears on the floor. Pick it up before returning to her.
How to solve Maleficent’s Decoration Puzzle
Rather than talking to her, you’ll have to place them down through another Decoration Puzzle. Fortunately, we have wall markings to show us where to place them.
Once you’re ready to begin, place her throne and spinning wheel on the pedestal. They’ll appear in the wrong spots at first, but we can enter furniture mode to move them. From here, you’ll need to arrange each item so they match their wall shadows. The easiest way to complete this is to match them to their side wall counterparts first before moving them toward the center.
The image below shows the final solution for Maleficent’s decoration puzzle.

With that out of the way, it’s time to enter Maleficent’s throne room to catch her pets. Don’t worry; it isn’t anything terrifying or overly complicated. Instead, you’ll see a cute little shadow frog hopping around.
Don’t be deceived by its appearance, though. This little guy hops quickly, and you won’t be able to rely on slow traps for this. It’s all about chasing it down, predicting its movements, and backing it up into a corner if you can.

Once you catch the first, three more will spawn. Repeat the process a few times until you get them all. After catching all three, return to Maleficent to wrap up Disney Dreamlight Valley’s Mistress of all Evil quest.
