Whether you’re just trying to clear some space or you’re dealing with some kind of software glitch, sometimes the best approach to cleaning your hard drive is doing a full factory reset. Luckily, performing a reset on the Oculus Quest 2 is easy, and you can set one off from the device itself or via the Meta Quest app on your phone.
Resetting from the Quest itself
If you’ve got your Quest handy, you’ll just need to make sure that it’s powered off before starting the process.
- Hold down the power and volume down buttons
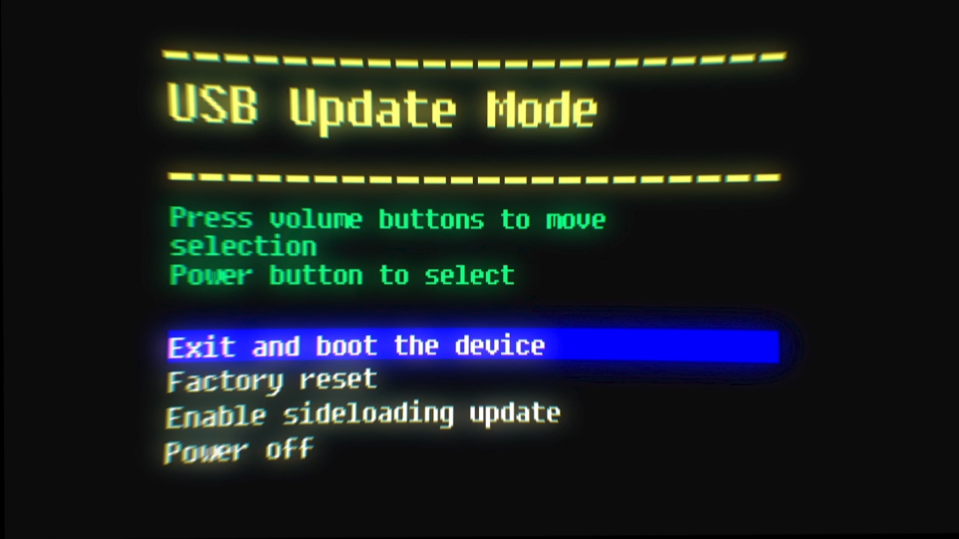
- After a few seconds, a boot screen with multiple options will appear
- Use the volume buttons to scroll down the “Factory Reset” option
- Use the power button to confirm your choice
The Quest will give you a prompt checking that you’re sure you want to wipe all the data off your device, and after selecting yes it will handle the reset.
Resetting from the Meta Quest App
Resetting your Quest through the app is also an option, though it’s a bit more of a hassle.
- Make sure the Meta Quest app is installed on your phone
- Turn on Bluetooth and activate location services
- Turn on your Quest
- The app will prompt you to connect with your Quest
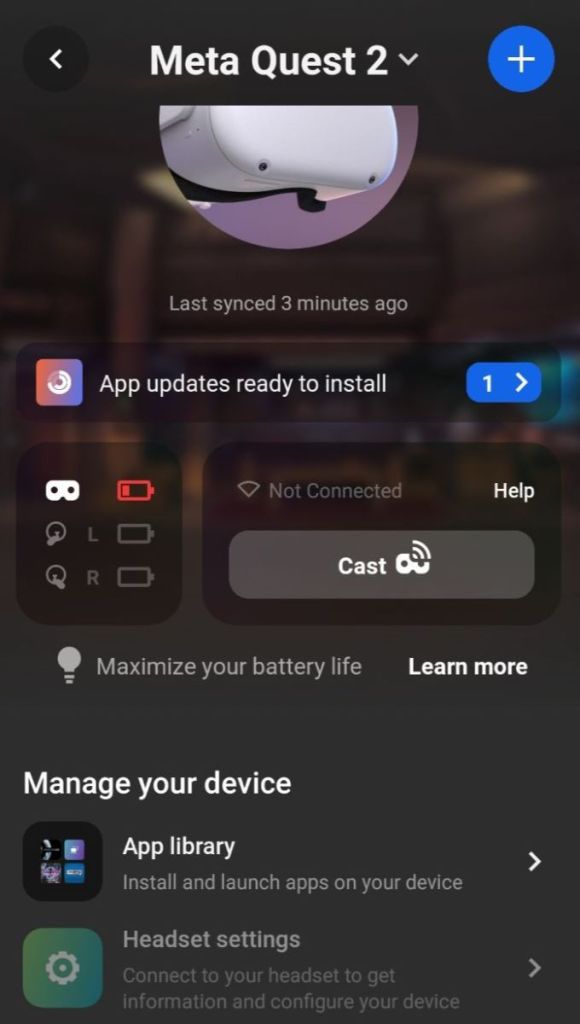
- Once connected, select your Quest from the app homepage
- Scroll down and select “Headset Settings”
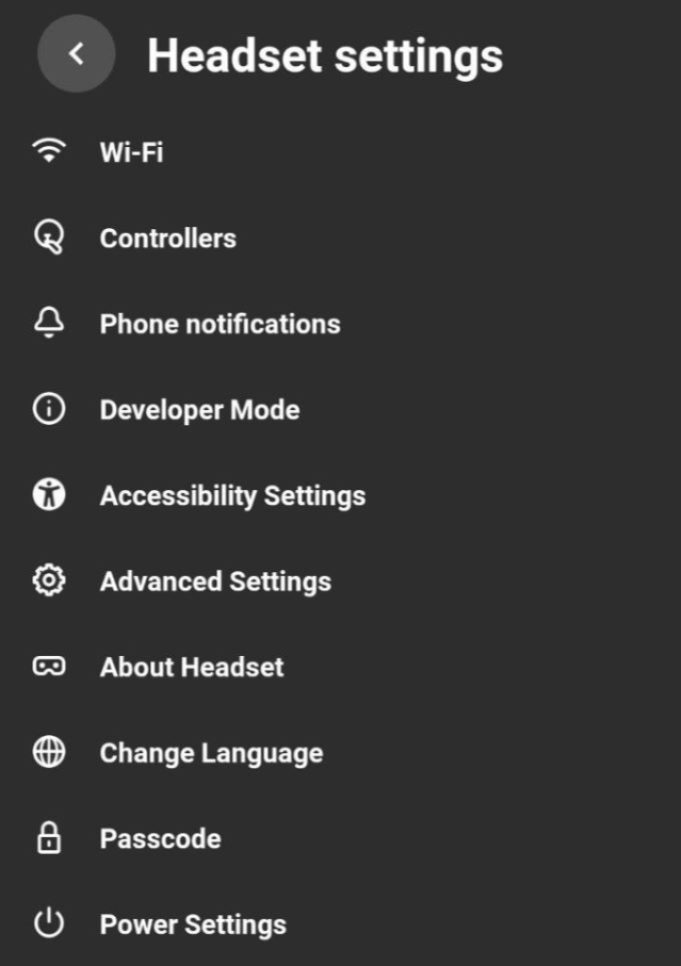
- Look for the “Advanced Settings” option
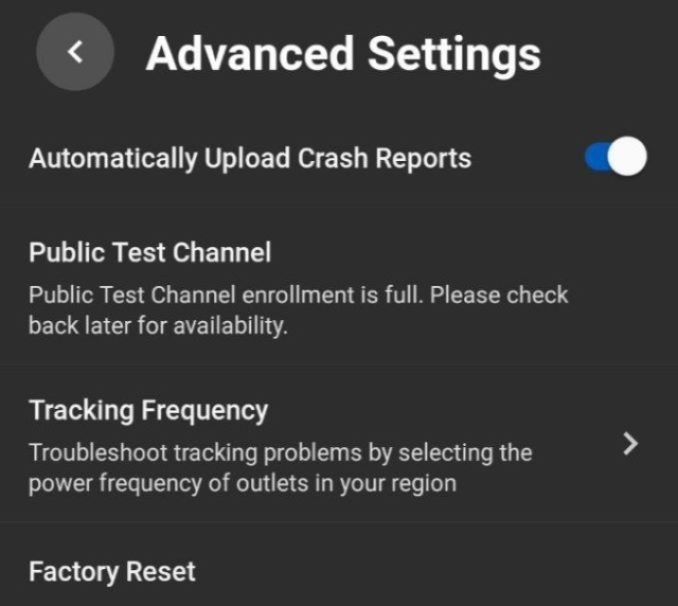
- Select the factory reset option
Once you tap on reset, the app will double check that you’re sure before going ahead and wiping your device remotely.
Whichever option you choose, it will only take a couple of minutes for your Quest to finish the reset process. Afterwards, you’ll have a fresh start with the device.
